Ahhhh! It is always a pleasure type the write-up on the newly finished keyboard itself.
So here it is: Redpoll – a low profile, unibody split, columnar, wireless, mechanical keyboard.
TL;DR
- Kailh Sunsets (Choc v1)
- Nice!Nano v2 running the awesome ZMK firmware (config here)
- MBK blank, black, PBT, choc keycaps
- Choc spacing: 18x17mm²
- Handwired
- Case hand made out of laser cut birch plywood
Dimensions
- Width: 263 mm (10″)
- Depth: 120 mm (5″)
- Height: 17 mm (2/3″)
(3 mm rubber feet, 8 mm case, 6 mm switches and keycaps) - Weight: 176g (urgh, imperial system. Around 6 ounces?)
Case Design
The case was designed with Clojure and OpenScad, much like they Dactyl/Manuform projects. Code and scad files here. The files can be exported as .dxf or .stl using OpenScad.
Case
The case is made out of five layers of 1.5mm birch plywood (1/16″) totaling 8mm (1/3″) in height. The inside of the case is extremely tight as it is optimized to be as flat as possible. The top cutout is for the controller, the bottom one for the battery.

It is so tight in fact, that wires can only cross where there’s more space, e.g. in cutouts or below switches. (The wires have a diameter of 0.9mm but the clearance is only 1.5mm in most places)
The plate is comprised of two layers of plywood. The lower part has slightly bigger cutouts so the switches can click into the top part (after additional sanding). After gluing them together they make a sturdy 3mm plate.
This time around I chose not to use the hand saw and instead laser cut the plywood. Luckily friends own a laser cutter (when you’re reading this: thanks so much), where I could cut for free. I used a sheet of laser ready plywood that uses water-based glue. This saved some build time and let me achieve higher precision than before. (However, the saved build time was more than counteracted by required planning and designing up front)
Wiring and Firmware
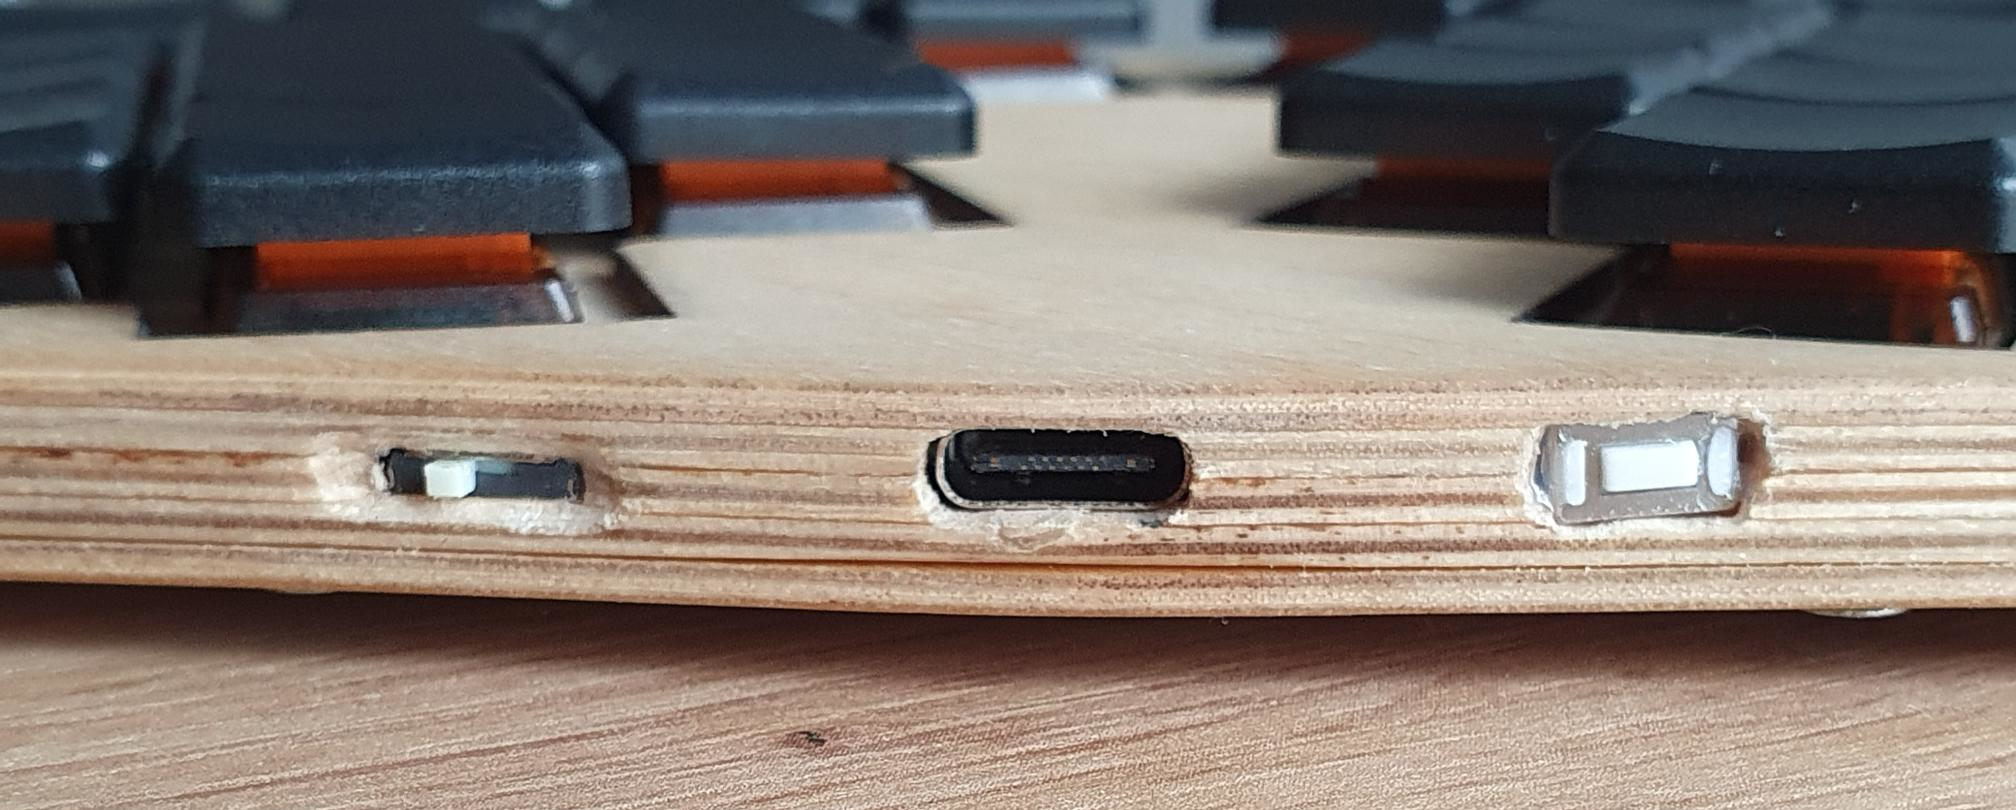
Redpoll has a USB jack for charging the battery and flashing the firmware. It also features both a reset button and a power switch on the backside.
The wiring was extremely tight. I had to make sure wires were soldered to the bottom part of the switch contacts so I could clip off the top part that would otherwise have impeded the bottom cover.

I used 14 pins, 6 colums, 8 rows which is enough for the 46 switches. 6×8 also makes me use 2 less pins and more importantly two less wires than a 12×4 matrix.
Rubber Feet
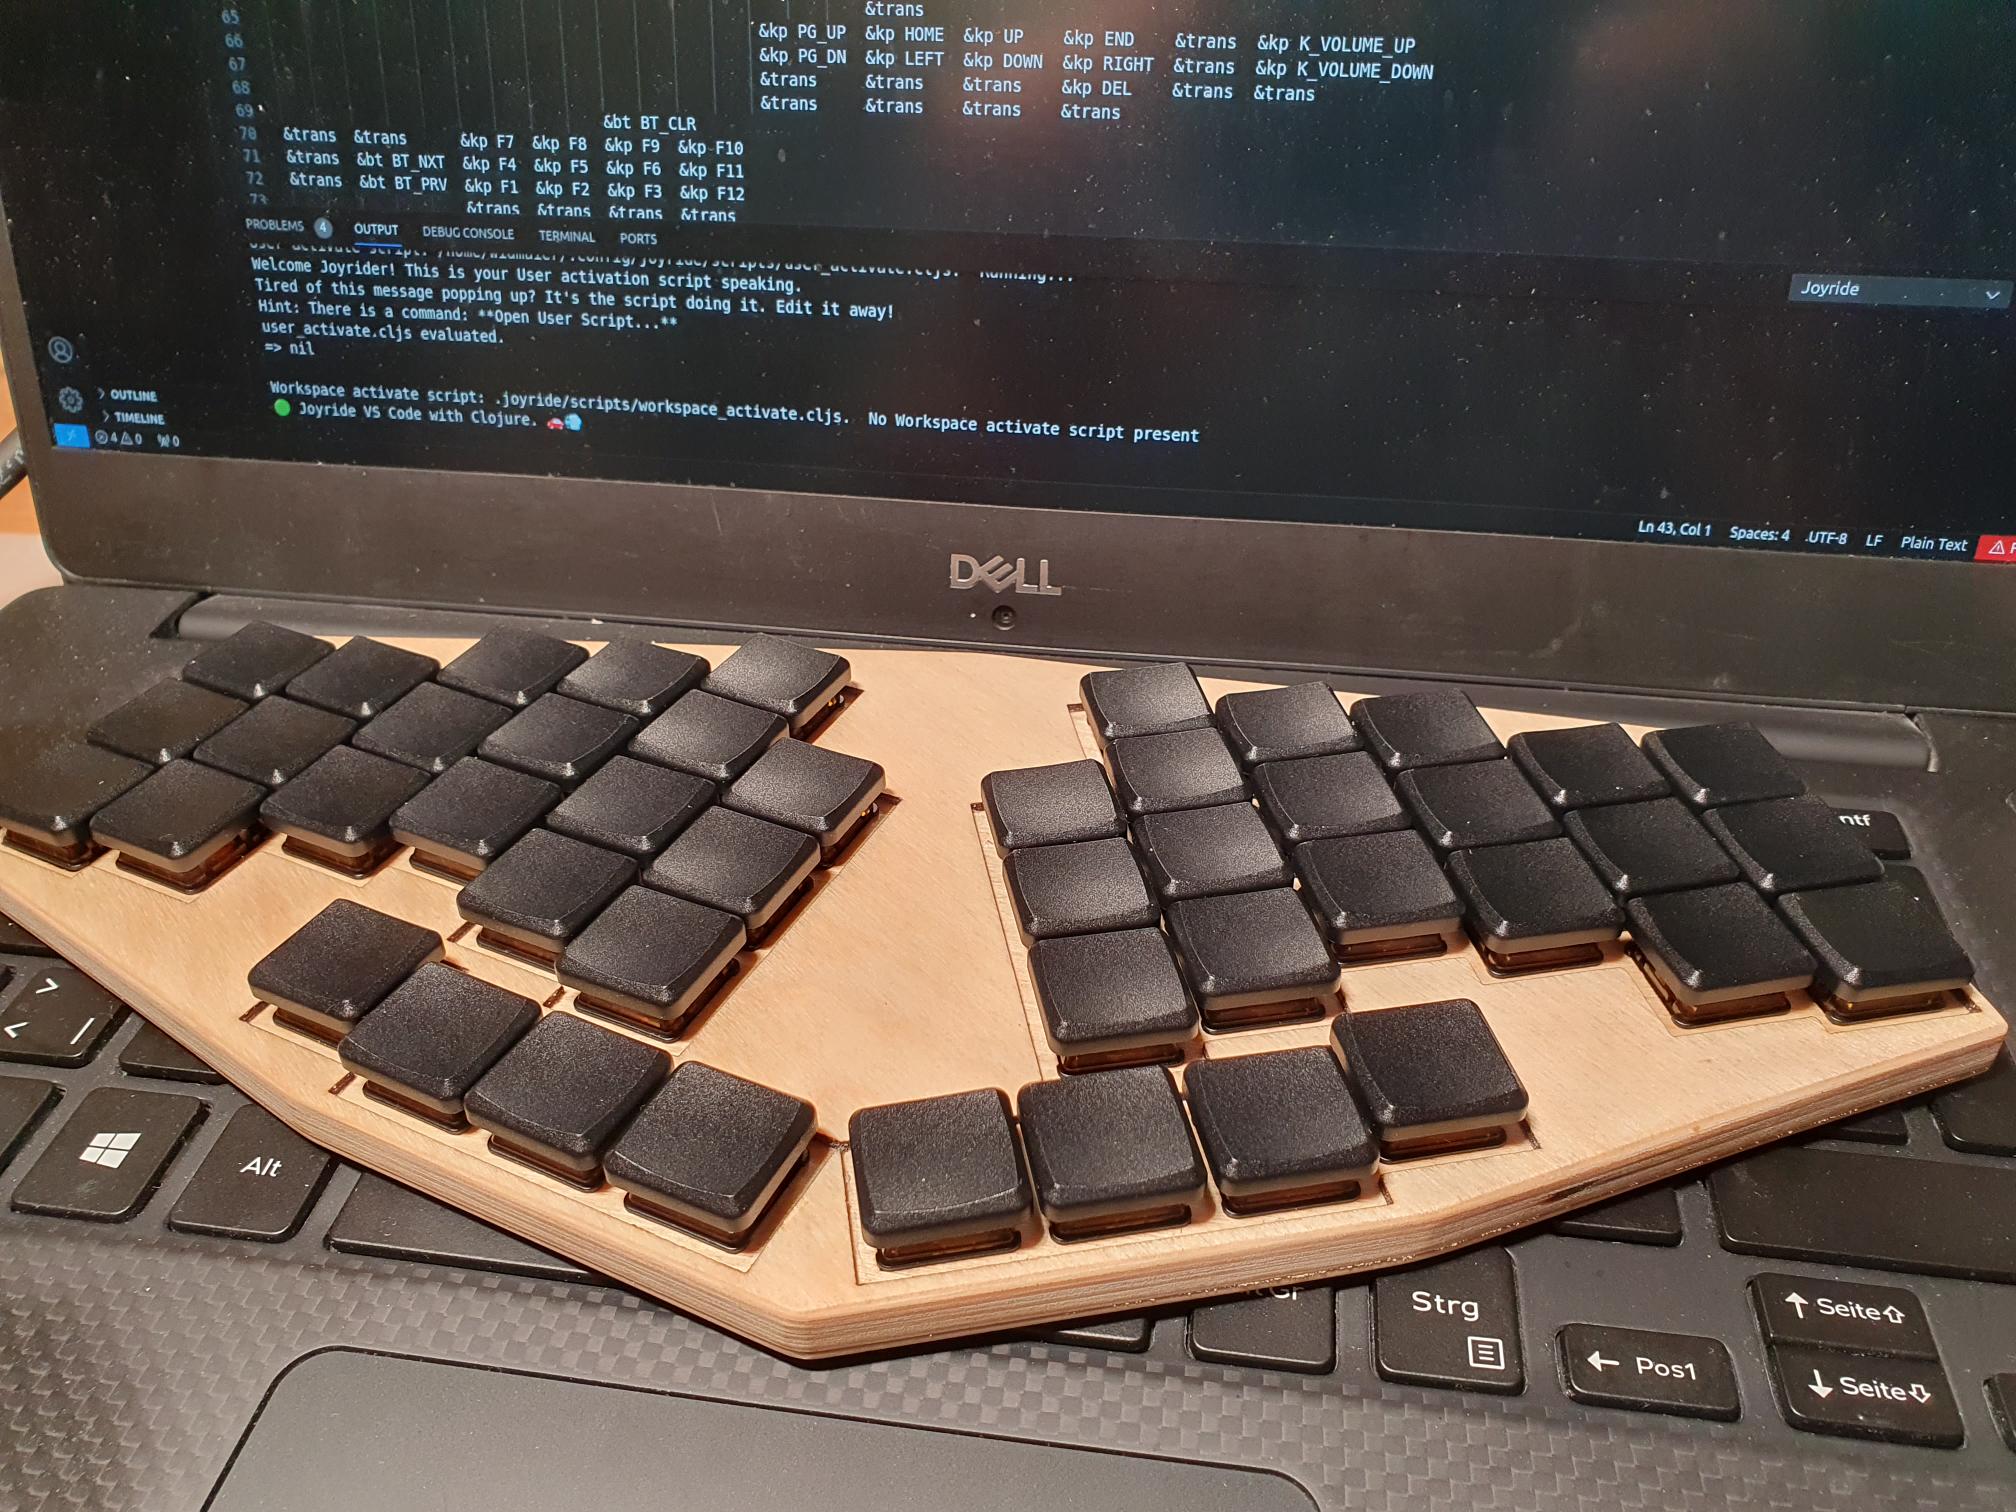
It may not look like it, but the rubber feet serve a very important function. They let redpoll sit on top of a laptop keyboard without pressing the keys.

This allows using redpoll and the laptop’s touch pad at the same time without additional accessories (like a laptop keyboard cover).
The rubber feet are designed to fit between the keys of the laptop keyboard and are tall enough to raise redpoll above the laptop keys. That’s why they’re 3mm, way taller than I would have made them otherwise.
The vertically aligned feet (the top ones in the picture) are intended to stand between F-keys and number row. The horizontally aligned ones sit in the bottom row between z and x as well as between m and . (dot). The distance between them is a multiple of 19mm. This makes redpoll fit any laptop keyboard with a vertical key distance of 19mm, even if the row stagger and the vertical distance differ. (Which is the case with Mac and Dell laptop keyboards)
They are cut from square rubber feet.
Cost (in €)
- Controller: 26
- Battery: 10
- Keycaps: 25
- Reset + power switch + rubber feet: 2
- Switches: 40 (only downside to sunsets which are otherwise fantastic low profile switches)
- Plywood: 24
All in all the material cost is around 130€ which is more than my previous builds. But also very reasonable for a small, mechanical, ergonomic, wireless keyboard.
I live in germany and bought my supplies from:
- Splitkb.com
- Keeb.supply
- architekturbedarf.de (plywood and also acrylic)
Differences to my previous builds
- Opening angle: 24 -> 36 degrees
- removed two keys (Esc, Backspace)
- moved keys back to the thumb cluster
- low profile, wireless+zmk obviously
Time spent
Roughly 10 hours for the case and 10 hours for the wiring. Several mistakes I made took their toll and dragged the build on longer than necessary.
Mistakes
I made a ton of mistakes and want to list some of them here.
- Switch and reset button placement and soldering.
Originally I planned to first solder the contacts and only then fit the power switch and button into their holes. The idea was to make the wiring easier. But that doesn’t work. Solder connections can’t stand too much bending and will break when trying to seat the button. I ruined one power switch and had to rethink my approach. The switch and button had to be seated first and then wired. That means the contacts needed to be accessible from inside the case which, sadly, I hadn’t planned for. So I had to drill and chop away some wood in certain places. In the end it worked out (I had a spare power switch luckily) - Floppy wood bottom
I had used plywood before but was still surprised by how floppy the plywood was. Previous builds used 2mm thick wood, additionally the laser plywood with the water based glue is even more floppy than usual. This causes the bottom cover to not close properly and leave a slight crack open. Sadly not much I can do about it. - Wiring error (messed up cols)
I made a mistake when planning the wire paths. One side of they keyboard now has column order 4, 5, 6, 1, 2, 3. Luckily this is easily fixed in the firmware using a matrix transform. - Laser cutting errors
When cutting one of the plywood layers, the wood bent upwards and caused 3mm to be cut off from one corner. Luckily it only affected one layer. Because plywood and glue are pretty forgiving I could replace the missing part without much problems (see far left).
Why „Redpoll“?
The name is derived from the bird species called „common redpoll“. I chose this name because:
- the overall keyboard shape and the plate design in particular reminds me of a bird
- the keyboard is designed to be portable (lightweight, slim) which corresponds to the redpoll being a (partly) migratory bird
- the keyboard case is constructed from birch plywood and the redpoll’s life is closely connected to birches. So close in fact, that the german name is derived from it („Birkenzeisig“).
